
01 Prologue source ↗
Why “manifesto” is the right word.
The argument starts with a piece of history. Look at the long arc of Bitcoin custody and you can divide it into three epochs, each one made possible by a specific technical standard, and each one moving a little more control toward the person holding the coins.
Core and paper wallets
The earliest way to store bitcoinBitcoin Core was of course the first place coins lived. Paper wallets represent the early creative attempts at storage with better security assurances — printed key pairs, generated offline, held as physical objects.
The hardware wallet era
Enabled by HD wallets & BIP39Proprietary, USB-connected, secure-element-equipped devices. A genuine leap in custodial security — but with significant compromises, several of which amount to varying degrees of reliance on third parties.
Stateless, transparently airgapped signers
Enabled by PSBT & multisig standardsUshered in by the partially signed Bitcoin transaction standard and the refinement of multisig. The work of this epoch is widening the separation between the software that talks to the Bitcoin protocol and the software that touches private keys.

“With the right mix of design inputs, users can have access to simple, user-friendly bitcoin self-custody, with solid security assurances, using inexpensive, discreetly-acquired hardware, & FOSS code.”
The guide's thesis, in its own words
There is a second claim folded into that sentence. A do-it-yourself device built from general-purpose hardware and free, open-source code shifts control away from the sellers of purpose-built proprietary hardware wallets, and puts it back in the hands of the people using it.
02 Introduction source ↗
Holding your own keys is not a virtue-signalling exercise.
Most bitcoiners already accept the premise — as a digital bearer asset, personal custody is a huge part of the ethos. But the guide is careful to spell out what self-custody actually does for you, because the reasons are not interchangeable.
- Protects owners from loss of funds due to custodial service thefts or rugpulls
- Allows you to send bitcoin to any recipient without needing permission from anyone
- Is foundational to privacy-conscious bitcoin usage
- Protects bitcoin as a financial asset from rehypothecation and other forms of value dilution
- Helps users understand the network's technical fundamentals — when done properly
Securing your assets is the reason that motivates nearly everyone: where your money goes, your mind follows. But for many people earnestly trying to reach the self-custody finish line, things get in the way. Life happens. A lot of it comes down to uncertainty and analysis paralysis. What hardware do I need? Which software is best? Where do backups go? Which security trade-offs make sense for me?
The guide's response is to prune the decision tree on purpose. It picks a framework, minimises the number of branches, and then tries to justify each choice as it goes. That is also why the early sections read more like an essay than a manual — the author set out to write a step-oriented document and found the questions of “why” and “how” kept coming back.
“If people don't understand the ‘why’ behind their actions, they're not going to have a high degree of confidence in, or conviction about, what they're doing.”
And confidence is most of the job
What the guide assumes about you
- You understand the basic mechanics of sending and receiving bitcoin
- You are securing what is — or you expect to become — a significant amount of value
- You will spend a reasonable amount of time and energy building a system
- You will spend at a bare minimum around $100 on hardware and supplies
- You have access to at least two remote, secure locations for key storage
- You are comfortable with SeedSigner's security model
What you'll need on the table
- A webcam-equipped computer running Sparrow Wallet
- An assembled SeedSigner signing device
- A printer with paper
- Some sort of metal backup solution — optional, but strongly recommended
Sidebar: why Sparrow for this guide?
Sparrow runs on all three desktop platforms and is best described as a wallet coordinator: you can use it for single-signature wallets, but its real value is taking several private keys and coordinating them into one multisig wallet. It expects an internet connection and manages your wallet's interaction with the protocol.
Specter Desktop does much the same job. (Side note: the Specter team also created Specter-DIY, the airgapped DIY signer that was a big part of SeedSigner's inspiration — it comes back in chapter 04.) Specter Desktop generally expects you to run a full node, either purpose-built or as an instance of Bitcoin Core on the same machine. Running a node is unarguably more secure and more private, and the guide's author thinks most bitcoiners should do it or aspire to — but did not want it to be a deal-breaking requirement here.
BlueWallet is mobile-first, which matters enormously in the many parts of the world where a phone is how people reach both bitcoin and the internet. Its Achilles heel for this guide specifically: no testnet support, and chapter 08 leans hard on testnet. Since the guide was written, Nunchuk and Keeper have also arrived as SeedSigner-compatible mobile coordinators.
The bottom line: all of these work. Sparrow was chosen to keep the instructions from getting overwhelming.
03 Why multisig source ↗
Think of it as a board, and your coins as the treasury.
Multisig has a bad reputation, and the guide argues the reputation is a historical accident. When the concept gained traction years ago the hype was real, but proper tools took a long time to arrive — and by the time they did, the hype had died down. What stuck was the impression that multisig is a niche option for sufficiently technical people.
One of the guide's stated goals is to discard that notion entirely. If a multisig wallet is too complex for most bitcoiners to use in practice, that is the fault of the wallet's creators, who need to return to the drawing board.
The most approachable framing: a multisig wallet is a kind of corporate board — in technical speak, a “quorum”. Your funds are the board's treasury. They move only with the approval of a certain number of board members, the “cosigners”. The chartering documents drawn up when the board was created — the “multisig policy” — dictate how many votes it takes. Usually that is a majority: think 3-of-5.
A board that let a single member move funds alone would not make much sense. A board that required every member to approve would be difficult to manage. Like most analogies this one breaks down as you go deeper, but it is a good place to start.
Advantages
- Introduces fault tolerance — no more single point of failure
- Allows physical, geographic distribution of the keys in a wallet
- Facilitates distributing custody among multiple, disparate parties
- Allows different hardware and software security models among cosigners
Disadvantages
- Increased technical complexity that could result in loss of funds
- Increased volume of information that needs to be stored and maintained
- Users making multiple mistakes could still result in loss of funds
The insight worth sitting with
With a single-signature wallet, the standard defence against losing a key is to keep a second copy of the secret, usually somewhere remote with an emphasis on physical security — because the first copy is protected by technology instead: a secure element, a PIN.
But the mere existence of that second copy ironically raises the risk of the key being not lost but disclosed — think a rogue bank employee snooping in safe deposit boxes, or a targeted attack on your “remote-but-secure” location. You halved one risk and doubled another.
The core advantage of multisig is that it creates a situation where losing a secret or disclosing one does not necessarily mean catastrophe. The guide's position is that this fault tolerance outweighs the added complexity and information management, especially for a substantial amount of value — and it says plainly that others are welcome to weigh the trade-offs differently.

04 Where it came from source ↗
A cheapskate, a forensics lab, and a $35 device that remembers nothing.
The guide's author did not originally intend to tell this story. It went in because the device's odd characteristics only make sense once you know which problem each one was solving. Nearly every distinctive design decision in SeedSigner traces back to a practice borrowed from digital forensics.
It starts with a confession: convinced that multisig's benefits outweighed its costs, but frugal — “or put more bluntly, a cheapskate.” Spending $500 or more on hardware wallets was unappealing. The guide is candid that this instinct is a mistake; depending on the value you are protecting, it absolutely makes sense to spend a reasonable proportion of it on safeguards. But the inner cheapskate was convinced there had to be a way to run multisig without buying several devices.
Enter Specter-DIY
A do-it-yourself Bitcoin wallet made from easily acquirable electronic components. The most interesting part was how it moved data: animated QR code sets carried a proposed transaction from the coordinator software to the DIY device where the private key lived, and then carried the approved version back — again by QR.
To someone with a background in digital forensics, this made immediate sense. The private key stayed on hardware physically separate from the coordinator, with only a very narrow QR-exchange channel between them instead of a USB connection. Elegant, and relatively simple.

“When you connect two electronic devices, ‘things can happen’ that involve either the transfer of data, or the creation of new data, as a result of the connection.”
Locard's exchange principle, applied to computers
Criminal forensics rests on Locard's exchange principle: when two items make physical contact, microscopic material passes between them and remains as evidence of the contact. Loosely applied to digital forensics, connecting two devices is never a neutral act. Practitioners take great care over when and how evidentiary devices are allowed to touch collection devices, and they document and explain the results.
Read the QR-exchange protocol again with that in mind and it stops looking like an inconvenience.
Then: a Raspberry Pi with no radios
Interest in Specter-DIY led to casual conversations with the Specter team and with security researcher Michael Flaxman, author of the 10x Bitcoin Security Guide. Flaxman had put out a public call for an enclosure for the DIY; the guide's author, having tinkered with 3D printing and CAD, took a shot at one.
In the course of that, Flaxman shared an idea for a simple device pairing a Raspberry Pi Zero with a display-plus-controls module. You would enter the seed words you had randomly selected from the BIP39 list, and the device would calculate the final word — the checksum that guards against transcription errors in the words before it.
The beautiful part was the specific hardware: the Pi Zero version 1.3, which does not physically include the components needed for WiFi or Bluetooth.
That detail landed because it mirrored lab practice. In mobile forensics, radio isolation — Faraday enclosures, after Michael Faraday — keeps a device under examination off wireless networks and away from other devices. It stops incoming data from changing the device, the worst case being a “death from above” remote wipe, and it allows a controlled examination against a static data set. The author's own lab also ran an internal, deliberately offline network: evidence could move between machines inside the lab, but nothing could travel beyond it. No private data out, no undesirable data in.
A computer with no means of wireless communication enforces exactly that isolation, in a “can't be evil” way. Components were ordered, rudimentary coding skills were applied, and without too much trouble a proof of concept appeared: enter 23 BIP39 words, and a Python Bitcoin library called Embit — credited to Stepan Snigirev of Specter — generates the correct checksum word to complete a proper seed phrase.

The question that produced the most important design decision
With an inexpensive camera added, the core airgapped transaction-signing trick of the Specter-DIY could be replicated. After some stackoverflow-intensive research, the QR-exchange signing process worked, and the full concept of SeedSigner existed.
One problem remained. Would you really want this little device to remember your private keys? With no secure enclave anywhere in the Raspberry Pi platform to give any assurance a key was stored safely, the answer was a resounding no.
The solution came from the forensics lab again. To acquire data from hard drives defensibly, examiners use Linux-based “live” operating systems: you power on the evidentiary computer, attach a collection drive, and use a bad guy's own machine to acquire its own storage. The defining property of these tools is that they run entirely in memory, so once you power the system off, no persistent residual data from the acquisition is left behind. RAM is volatile; remove power and the contents are permanently gone.
If the signing device were engineered explicitly not to remember private keys — using them only as Python variables in active memory — the problem of storing a key securely on it disappears rather than gets solved. And a device that stores nothing can safely be used with many keys, which removes the need for a dedicated piece of hardware per cosigner. The inner cheapskate got its answer.


And one advantage nobody designed for
As the idea got shared around, a privacy argument surfaced. A SeedSigner is not built from any component that most people would recognise as bitcoin-specific. You can acquire the parts without signalling to a merchant — or anyone else — that you intend to build a signing device or interact with the Bitcoin network. For people with strong privacy concerns, that is highly desirable. For people living where bitcoin use is discouraged or outright banned, and sourcing a hardware wallet is difficult and conspicuous, it can be the difference between saving in bitcoin and not.
- Operation in isolation — no USB, WiFi or Bluetooth — dramatically reduces attack vectors
- Low build cost makes the device accessible to more people in more parts of the world
- Statelessness makes using one device with multiple seeds and wallets feasible
- A fully FOSS software architecture makes independent build-from-source possible
- Non-bitcoin-specific hardware can greatly enhance privacy

05 The objections source ↗
There has to be a catch. Here are nine of them.
No technology is all positive, least of all security technology. This is the section that makes the guide worth reading even if you never build the device: the author lists every criticism of SeedSigner they are aware of, in the critic's own framing, and then answers each one — including the ones they concede.
01 Fair — and accepted
Direct access to seeds increases the opportunity for disclosure
Agreed. Though some people use the model for day-to-day storage, it was designed for cold storage — the expectation is 1–2 outgoing transactions a year, for larger spends or UTXO consolidation. Deposits, including to freshly generated receive addresses, never need a private key. So seeds should live in remote, physically secure, non-visibly secure, tamper-evident storage, and be accessed away from anyone or anything watching. A BIP39 passphrase is an excellent mitigation for disclosure risk during access.
02 Reasonable — a trade-off
Relying on one hardware and software profile for several keys in a quorum
Absolutely reasonable: if one device signs for every member of the quorum, a critical flaw in that key storage or signing mechanism could jeopardise the whole wallet. Best practice is multiple different profiles among cosigners. What you get in exchange is not buying several hardware wallets and not needing to become fluent in the correct use and maintenance of several different devices. The guide argues its design manages the downside — and says individual users have to decide whether they agree. “It's important not to let the perfect be the enemy of the really good.”
03 Reasonable
A full Linux installation has a large attack surface
True. Devices written to run on bare metal unarguably have fewer attack vectors and fewer opportunities to introduce malicious code. The counter-argument is operational: once the OS image is written to the MicroSD card in the signer, running the device in isolation from the internet and from other devices provides sufficient assurance that a user cannot inadvertently introduce code that exploits a Raspberry Pi OS vulnerability.
04 Disagree on the first half
Airgapped communication is security theatre with a worse user experience
Wholeheartedly disagreed on the theatre charge. Once the MicroSD card is in, the only channels to the outside world are the camera (in) and the screen (out). It is technically possible to leak key material via QR — but an attacker would need both a compromised SeedSigner install and a compromised partner computer able to recognise, capture and exfiltrate the secret. On UX: QR exchange is unarguably less convenient than the alternatives, and the guide calls that a more than acceptable price for keeping keys secret and isolated.
05 Rejected
Unpaid developers don't have the time, expertise or care to “do security”
Many of Bitcoin Core's most sophisticated contributors made their contributions without a company sponsoring the work. The guide calls this blanket statement sloppy, bordering on malicious. As a fully FOSS project the code is available to audit and anyone can propose changes. Security vulnerabilities are found in code written by professionals all the time.
06 Valid — but mitigable
No software validity assurance leaves room for malicious code
Conceded as generally valid. The Pi Zero has no mechanism to validate that installed software came from a trusted source, so a user could download a rogue build that harvests keys or swaps addresses in a PSBT. Just as self-custody makes you ultimately responsible for your stack, you are the software validation mechanism. The project publishes a PGP public key and signs a message containing a SHA256 hash of each release; step-by-step download, verification and write instructions live in the main repository's readme.
07 Not far-fetched — countered
An evil maid could use malicious code to exfiltrate keys
The classic evil maid has access to your private space and stumbles onto something valuable. Applied here, the guide notes, the attack is really “the evil adversary that can create sophisticated malware, then secretly accesses your signing device on multiple occasions, installs undetectable rogue software, and subsequently returns to abscond with your keys”. Not written off — but the countermeasures are reasonable: store the device somewhere relatively secure, use tamper-evident packaging if your environment warrants it, and if you ever suspect tampering, zero the MicroSD card and re-write the release image.
08 Too vague to answer
The Broadcom BCM2835 in the Pi Zero is closed source and possibly compromised
Described as perhaps the vaguest criticism the author has come across. No information has been located indicating a specific backdoor or vulnerability in the Broadcom chip used on the Pi Zero that would create a security problem for SeedSigner.
09 Fair — but a high bar to exploit
Portions of the Raspberry Pi firmware are closed source
Fair: the GPU-related part of the firmware is closed, and while it is a small portion, something is either open source or it isn't. But consider the attack. Nobody knows which boards will become signing devices, so the entire global Pi supply chain would have to be compromised so that every single unit carried the malicious functionality — for the miniscule fraction that ever become SeedSigners. Then the attacker must work out where the compromised devices ended up and gain physical access to them. And because the device operates in isolation, leaking a key by QR would additionally require the partner computer to be compromised to collect it.
A closing note on threat modelling
If you are trying to mitigate state-level adversaries capable of covertly compromising entire hardware and software supply chains, the guide points you at the graphic on the right, taken from The Hitchhiker's Guide to Online Anonymity.
All hardware devices are vulnerable at that level. And a corporate hardware wallet, purpose-built and marketed specifically to secure private keys, is a far more productive target for the extensive resources such an attack requires than a general-purpose single-board computer that might become anything.

06 Core functionality source ↗
So what does the thing actually do? Three jobs.
Generally speaking, SeedSigner helps you accomplish three independent-custody tasks: create secure private keys in a trust-minimised way, generate the extended public keys you need to configure a wallet, and sign transactions via animated QR code sets. Each deserves elaboration.
Job one — creating keys you have reason to trust
What makes a private key secure? That it is generated from information which is unpredictable, unreproducible and unguessable. Those three properties are essentially the mathematical concept of entropy. Software has got better at producing unpredictable data, but disagreement persists about whether truly random data can arise from organised, logical code written by human beings. It goes almost without saying: it is not best practice to trust a private key generated by a device that takes no user input at all.
The simplest and perhaps best source of entropy is the randomness of the physical world. The guide's favourite example is fingerprints — shaped by in-utero blood pressure, blood oxygen levels, maternal nutrition, hormone levels, amniotic fluid density and composition, fetal position and movement, even the sum of maternal movement during pregnancy. With that many inputs, recreating the conditions twice is virtually impossible, which is why no two people have ever had identical prints.
Bitcoiners need something quicker than nine months. SeedSigner offers three routes, and they are not equivalent — they differ in how much you must trust the device's code.
Words out of a hat
Randomly select 11 or 23 BIP39 words — often literally out of a hat — and let the device calculate the final checksum word. The most trustless option: you are only trusting the tool to do one calculation, and that calculation can be verified with another offline tool. The guide links a printable, cuttable BIP39 word list.
Dice rolls
Capture entropy from dice and convert the results into a key and a seed phrase for documentation. Verifiable with outside tools such as Ian Coleman's BIP39 tool and Coinkite's dice roll math documentation.
A photograph
Use entropy from a digital photo taken with the on-board camera. More than meets the eye goes in: not only the pixels of the photograph but the data from every preview frame rendered after the feature is activated, plus the Pi Zero's unique serial number and the number of milliseconds the device has been powered on. Very convenient — and of the three, the one that places the most trust in SeedSigner's code.
Job two — the extended public keys that define a wallet
Private keys are part of a cryptographic framework from the 1970s: public key, or asymmetric key, cryptography. Deriving the unique public key from a private key is relatively trivial; going back the other way is much harder, and considered computationally impossible when the maths relating them is complex enough. In Bitcoin, amounts are associated with public key values, and only whoever holds the corresponding private key can reassign them.
Early wallets were literally a collection of unrelated private keys, each with its own public key — and you had to keep an up-to-date copy of every one of them or lose coins. A Bitcoin Improvement Proposal replaced that with a “master” or “extended” private key from which a predictable sequence of child keys can be derived. The public counterpart is the extended public key, or XPUB: enough information to derive a predictable sequence of child public keys, and therefore to watch and receive.
Multisig goes one level up. Several extended public keys are coordinated together, and the collection of xpubs plus the specifics of how they combine is the wallet descriptor. SeedSigner's job here is to take a private key and produce the xpub the coordinator needs.

Job three — signing without ever handing over a key
If you are going to enforce separation between the coordinator that talks to the network and the offline device that touches keys, you need a way to move information across the gap. BIP 174 standardised the format: the partially signed Bitcoin transaction, or PSBT. Think of it as a rough draft of a transaction that is eventually meant to be broadcast.
The draft carries the basics — input and output amounts and keys, and the network fee. It is a draft because at the start it lacks the information needed to actually spend anything. It is a proposal.
To get the proposal across the gap it is broken up and packaged into a set of QR codes displayed on your computer's screen. SeedSigner reads them in, reassembles them, decodes the transaction and displays the details for review. If you approve — and the nuance here matters — the device inserts the necessary signatures. The keys active in memory generate cryptographic proof that the signer holds what is needed to authorise the spend. The keys themselves are not placed in the transaction and do not leave the device.
The updated PSBT is encoded back into QR codes on SeedSigner's screen and read into the coordinator through your webcam. The coordinator checks whether it now holds enough proof to spend. For a multisig wallet, you repeat that for as many signers as the policy requires.

Why the cumbersome method is the better one
Passing QR sets back and forth seems laborious next to a cable. The guide's argument for it has four parts: the exchange is limited in scope and duration, the information exchanged is auditable, it is explicitly apparent when communication is taking place — and, just as importantly, when it isn't.
That last point is the one people miss. With USB, Bluetooth or NFC you generally cannot tell whether anything is passing between the two devices. With QR you always can. If you suspect funny business, the transaction data can be decoded and inspected with third-party software; the guide notes this is more manual than it would like, and points at bip174.org as a good emerging tool. And if you want to abort the exchange, the way to stop it is obvious and immediate.
The guide is also honest that QR exchange is still early in terms of usability, with continuous refinements on both sides to improve scanning speed and accuracy.
07 Sourcing & building source ↗
Three parts. No soldering required to get started.
Raspberry Pi Zero v1.3
the board
The absence of WiFi and Bluetooth hardware is what makes the 1.3 ideal: it is an inherently airgapped system rather than a system configured to behave like one.
Waveshare 1.3″ 240×240 LCD hat
≤ $15
Nothing terribly special about it — the big advantage is that Waveshare publishes a Python-friendly driver, which made it possible to hit the ground running. An earlier 120×120 module got tried first; on a screen that small the extra pixels turned out to matter. Order the 240×240 designation: Waveshare sells similar-looking modules that will not work with the released software.
Pi-compatible camera
≤ $10

Most builders use a very inexpensive stock camera with an OV5647 sensor, capable of 5MP/1080p. Watch for the cable: a Zero-compatible ribbon is typically gold in colour and narrower than a standard Pi camera cable. A more compact profile also exists, designed for the Zero, with some electrical components built into the cable itself. Decide which enclosure you want before choosing.
A MicroSD card of at least 1GB — no particular class or brand, any larger capacity is fine — and a MicroUSB cable. A phone charger gives ample power, as do a laptop's USB ports; a USB power bank makes the device properly portable. One caution: a 9V-to-USB adapter often does not supply enough power for the camera, and various malfunctions follow.
On other Raspberry Pi models
SeedSigner is confirmed to work with the Raspberry Pi 2/3/4 and the Pi Zero W/WH/2W. Most of those ship with wireless hardware installed. As availability of the Zero v1.3 dried up through 2021, the modules needed for WiFi and Bluetooth were excluded from the prepared releases in the project repository — so from SeedSigner version 0.4.5 onward, running on one of those boards puts a software airgap in place instead of a physical one.
That software airgap means placing additional trust in the prepared release, which is why the Zero v1.3 remains the recommendation for full assurance that wireless communication simply is not possible. Community members also went to work on physically disabling the radios on the various boards; multiple approaches are documented here.
The Pi Zero has three user-accessible ports: two MicroUSB and one mini-HDMI. The two MicroUSB ports look identical, but the one nearest the thumb-stick is power only, and the one beside it carries power and data. Most users want the power-only port — using it guarantees no data can be sent or received over USB. Developers and testers may prefer the power+data port to reach the device over SSH-over-USB. The mini-HDMI port is also mainly a developer convenience.
Keeping it all together
Several 3D-printable designs live in the project repository, each with an information page describing its characteristics and the specific hardware it accommodates.


08 Practice first source ↗
Testnet was technically the first altcoin. Use it before you use your savings.
Testnet is an entirely separate implementation of the Bitcoin protocol, with its own nodes and miners, where the coins are intended to have zero value. It is the most realistic and accessible way to practise — and the great majority of bitcoiners have never touched it, partly because not every wallet and tool supports it.
Sparrow does, and setting it up is simple. The key move is launching Sparrow from your terminal with a flag specifying the network:
| Windows | Sparrow.exe -n testnet |
|---|---|
| macOS | open Sparrow.app --args -n testnet |
| Linux | Sparrow/bin/Sparrow -n testnet |
Sparrow should pre-populate the settings needed to reach a default public testnet server. If that one gives you trouble, or you would rather use another, the guide points at a list of alternate testnet servers. You will also need coins to play with; the guide's preferred source is this faucet. More detail on the launch flags lives in Sparrow's own FAQ.
Bitcoin's test networks and their faucets change over time. The commands and links above are reproduced as the guide has them; check the current state of testnet support in Sparrow and the SeedSigner release notes before relying on any specific faucet or server.

Why the guide insists on this
The author's first cold storage setup, built in 2013–14, was a series of offline-generated key pairs printed onto slips of paper with bitaddress.org. It was secure the whole time it was in use. But it had barely been tested, and there had never been an opportunity to practise redeeming or spending from it.
Over a long bear market from 2014 to 2016 the anxiety grew — the creeping question of whether the accumulated value is “real”, and whether you will actually be able to get at it when you want to. When the exchange rate started rising again, that anxiety culminated in moving every coin out of cold storage into an exchange account, where they were sold in early 2017 during the fork wars. The guide recommends The Blocksize War by Jonathan Bier to understand that period.
“It goes without saying that I own a lot less bitcoin now, and what I do own was all purchased at higher prices than those at which I panic sold.”
“A big part of my mission with SeedSigner is to help people avoid making a similar mistake — friends don't let friends sell bitcoin. Don't be weak-handed like I was.”
Take the time to think through how you'll be most comfortable holding your coins over the long term. Then bring that setup into reality.
09 The walkthrough source ↗
A 2-of-3 multisig wallet, start to broadcast.
Sparrow is running in testnet mode and you have a working SeedSigner. Fourteen steps from here to a signed, broadcast transaction. The screens below come from the guide; specific amounts, fees and change values will differ on your own device.
Create three private keys
Any of the three entropy methods works. The guide moves quickly here and uses seed-from-image, then repeats the whole process twice more for a total of three keys. As long as you are satisfied you kept these keys secret during testing, you can reuse them for your mainnet wallet later.
SeedSignerSeedsCreate a seedNew seed (camera icon)click joystickreshoot | accept

Write the words down, then verify the backup
After choosing the mnemonic length you get a screen showing your 12 or 24 words. Write them down and double-check what you copied using Verify Backup. You are then offered the chance to apply a BIP39 passphrase before finalising. The guide does not cover passphrases here, but be aware of what one does: it transforms the seed into a completely new private key that cannot be accessed without the words and the exact passphrase.
Optional but recommended — transcribe a SeedQR
Once the seed is finalised, you can use SeedSigner's manual transcription interface to record the phrase as a single-frame QR code, which makes importing the key back into the device fast and easy later. Expect the transcription to take about ten minutes.
SeedSignerBackup SeedExport as SeedQRselect format

A QR-encoded seed should never be scanned into a device that connects to the internet. SeedSigner should likely be the only thing that ever reads it — with the possible future exception of another QR-enabled signing device. Never your computer's webcam. Never your phone's camera. It is secret information that grants access to your funds. If you would rather not encode a key as a QR at all, the words can always be typed into SeedSigner by hand.


Create the wallet in Sparrow
With Sparrow in testnet mode, make a new wallet and give it a sensible name.


Set the policy to multi-signature
Choose Multi signature as the Policy Type. Leave the Script Type as Native Segwit (P2WSH).

Charter the board: three cosigners, two required
Selecting multisig makes a Cosigners control appear in the top right. Set the sliders so the wallet has three cosigners in total and requires a minimum of two to authorise a transaction.

Start adding cosigners
Cosigners are called Keystores in Sparrow. There are three tabs, one per member of the quorum. Under Keystore 1, choose Airgapped Hardware Wallet, which lists the supported airgapped devices.

Put the SeedSigner on testnet — don't skip this
Return to the device and make sure the network is set to Testnet, or the keys you export will not match the wallet you are building.
SeedSignerSettingsAdvancedBitcoin NetworkTestnet

Export the first extended public key
This assumes you have temporarily loaded the seed you want to use. After the Xpub Details review screen, one or more QR codes appear representing that seed's extended public key.
SeedSignerSeedsselect your seedExport XpubMultisigNative SegwitSparrowExport Xpub


Scan the key across the airgap
Back in Sparrow, press the SeedSigner Scan button to activate your webcam, and scan the QR codes off the device's screen.

Press up or down on the thumb-stick to change the brightness of the displayed QR code if the screen is glaring. Ambient lighting affects focus. Setting QR Density to Low can also resolve scanning trouble. Some low-budget laptop cameras simply lack the resolution; with some of them, advanced driver settings can be tweaked to make them workable — the guide links a walkthrough for Windows.

Repeat for keys two and three, then Apply
Once all three keystores are filled in, click Apply. Sparrow offers to add a password to the wallet file; the guide leaves the fields blank and clicks No Password.


Back up the wallet descriptor. This is the step people skip.
Not much appears to change, but the wallet now exists. The very first thing to do is make a static backup of the full wallet descriptor — every extended public key, plus the exact configuration describing how they combine. There are two reasons, and the first is blunt:
- If you ever lose one of your three keys, the full descriptor is essential to keep access to your funds. Lose a cosigner key and have no descriptor and your funds are permanently lost.
- If you later want to verify that a receive or change address really belongs to your wallet as originally configured, a historical record is your best resource. SeedSigner is stateless and will not remember your wallet configuration — and if your coordinator were ever compromised, an attacker might feed you a falsified descriptor to defeat address verification and steal funds.
A wallet descriptor is designated private but not secret. In the wrong hands it can be used to monitor every transaction your wallet makes — but it does not contain what is needed to access your funds. That distinction shapes where you are willing to keep it: printed hard copies are entirely acceptable, and so is a file on your computer, or even in “the cloud” — someone else's computer.
SeedSigner is compatible with Specter's descriptor format. In Sparrow, with the wallet loaded, go to File → Export Wallet and scroll to the Specter Desktop entry at the bottom of the list.


Receive, then build a spend
The Receive section hands out addresses without touching a single seed phrase — which is the whole point: Sparrow can accumulate bitcoin over years while your keys stay in their remote locations. When you are ready to spend, the Send section takes a destination address, a label and an amount.


Create Transaction gives you an overview of the transaction as constructed, where you can inspect inputs and outputs. Satisfied? Then Finalize Transaction for Signing, which reveals the signing options.


Across the gap, twice, then broadcast
Show QR brings up an animated QR code carrying the rough draft — the PSBT. On the device, choose Scan QR from the main menu and aim the camera at your screen, using the live display as a guide.
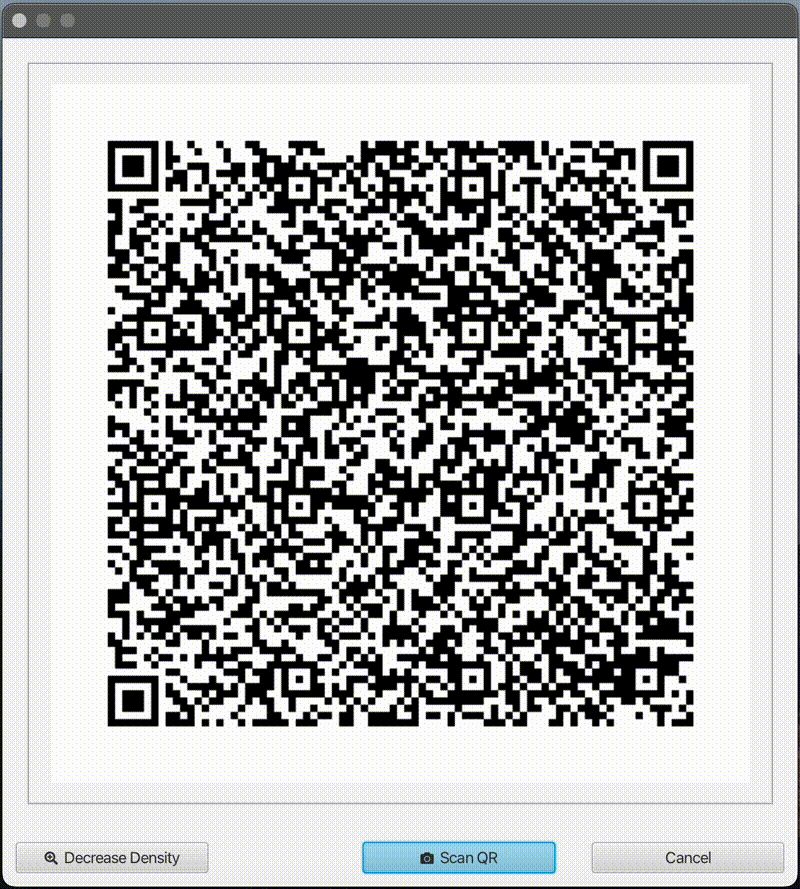
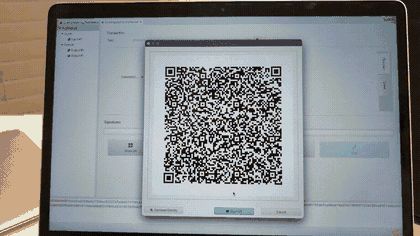
Once it is fully scanned in, the device shows you what you are actually authorising. Walk the review screens. If anything looks wrong, click the thumb-stick left to abort.
ReviewReview PSBTPSBT MathWill Send (recipients)Your Change


SeedSigner adds the signatures, re-encodes the revised PSBT into animated QR frames, and displays them. Close Sparrow's QR window, choose Scan QR in Sparrow, and read the signatures back in through the webcam.
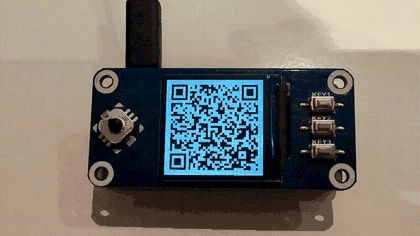
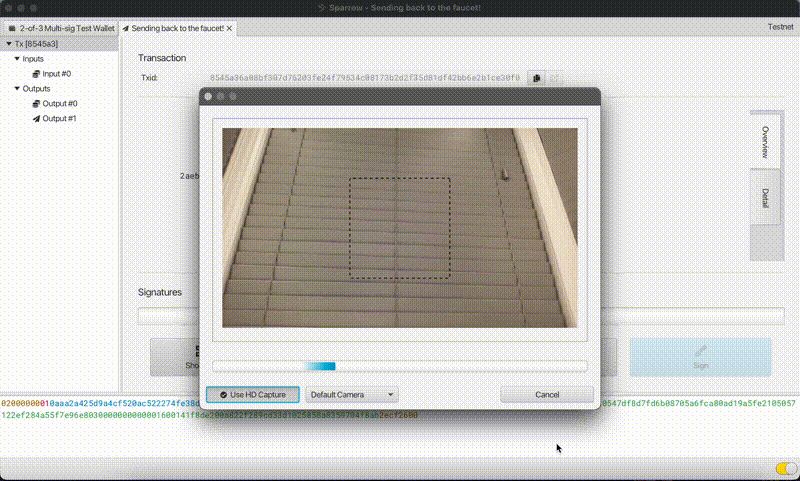
In the Signatures section, “SeedSigner 1” is now shaded blue: that member of the quorum has supplied what it needed to. Repeat the whole sequence with the second or third key, and the other slot fills in too.


Click Broadcast Transaction. This communicates the transaction, signatures included, to other nodes and enters it into the queue for inclusion in a block. Status will read “Unconfirmed” until it lands in one. Congratulations — you have run the whole loop without a private key ever leaving the device.
10 Final variables source ↗
Nine decisions the walkthrough deliberately made for you.
The steps above show the mechanics. Designing a system you will actually live with for years means going back through the choices that were pruned to keep the instructions manageable. The guide closes by handing each one back, with its own perspective attached.
Electrum server or full node?
Connecting your coordinator to someone else's server means implicitly trusting it for accurate, honest, up-to-date information about the network — and it can be a significant privacy leak. Your own node is far more private and trustless, but costs either a dedicated machine or several hundred gigabytes of local disk. A pruned node, which keeps no full historical copy of the chain, is a reasonable compromise with its own trade-offs.
How many members does your board have?
The guide demonstrates 2-of-3; 3-of-5 is another popular choice; the possibilities are effectively endless. As a real example, the project's own development fund is a 4-of-6 where four stakeholders hold one key each and the founder holds the remaining two — a little more influence over spends, while still allowing the founder to vanish without the funds becoming inaccessible.
12 or 24 words?
A rabbit hole of its own. Technically a 24-word seed captures significantly more entropy. But given a multisig wallet with at least three cosigners, the guide's view is that multiple 12-word seeds provide adequate inputs — while for a single-signature wallet it would choose 24. Worth deciding early, since 24-word seeds mean noticeably more work if you plan to hand-transcribe SeedQRs.
Passphrase or no passphrase?
The critical thing to understand is that a BIP39 passphrase transforms the seed into a wholly new private key that cannot be accessed without the exact passphrase. It is an extremely powerful protection against inadvertent or malicious disclosure; the trade-off is a new requirement to reproduce it correctly when you want to spend. Each key in the quorum can carry the same or a different passphrase — more safeguards, more complexity.
Duress or decoy funds?
Take a seed — probably the one stored at home — build a single-signature wallet from it, and fund it. If someone coerces you in person, you can produce that wallet as “all you have”. The amount should be enough to convince an attacker it is everything, or at least enough to make taking it and leaving worthwhile. This is a widely known technique, so decide whether it fits your situation.
Do you like heavy metal?
Pen and marker fade over the long term, depending on the writing instrument and the paper — and however well you choose, all of it burns. Metal QR solutions will keep improving, but even a low-cost metal washer backup is adequate for seed words. If you pick a 3-of-5 quorum, ask how likely it really is that three of your seeds are destroyed by fire.
How many copies of each key?
The guide is a firm believer in exactly one copy of each key in the quorum, almost certainly on metal. Two copies may halve your chance of loss, but stored in two locations they may double your chance of disclosure. And since tolerating the loss of a key is one of multisig's core strengths, one copy each is the coherent choice.
Where do the keys live?
Safe deposit boxes and in-home safes are the obvious two, and you will want real geographic distribution — same neighbourhood? city? region? country? — informed by how often you expect to need access. Factor in fire resistance, especially if you skipped metal. Friends with large gun safes can be a good option. Plan periodic “key checks” to confirm your seeds are still secure.
Tamper-resistant, or tamper-evident?
Bank employees are not supposed to be able to snoop through safe deposit boxes, but once your keys are out of sight you genuinely do not know. Tamper resistance adds a second barrier — a small locked box. Tamper evidence tells you whether someone tried. There are not many great products; consider the sealable bags law enforcement uses for evidence, and mark the seal with your initials or another unique marking.
And the one the guide is sympathetic to
Mixing in other signing devices. Beyond the scope of the guide, but some argue that a mix of devices from different manufacturers, with different codebases and security mechanisms, improves your overall posture — and the author says plainly they are sympathetic to that argument.
Playing devil's advocate against it: does becoming proficient with several hardware profiles justify the technical diversity it buys you? Weigh the costs and benefits and decide how many device profiles belong in your quorum.
“A complimentary perspective is to not let the perfect be the enemy of the sufficiently good.”
The through-line of the whole document
11 Closing & sources source ↗
A living document — and everything it points at.
The guide is explicitly intended as a living document, updated as the project grows. Its author invites suggestions from the start — including small grammar tweaks and spelling corrections — as pull requests or issues on the repository. If you spot something here that has drifted from the source, the source wins; go read it.
The closing thanks go to collaborators Nick and Keith for jumping into the adventure head-first, to all of the people who have contributed to SeedSigner in the wide variety of ways people have, and to @jevidon for an early review of the document.
The guide itself
- SeedSigner Independent Custody Guide — the complete original text, from which every quotation, figure and screenshot on this page is drawn github.com/SeedSigner/independent_custody_guide
- The SeedSigner project — releases, verification instructions, enclosures and docs github.com/SeedSigner/seedsigner
- Project site seedsigner.com
Wallet coordinators
- Sparrow Wallet — used throughout the walkthrough sparrowwallet.com
- Running Sparrow on testnet sparrowwallet.com/docs/faq.html
- Specter Desktop specter.solutions
- Specter-DIY — the airgapped DIY signer that inspired SeedSigner github.com/cryptoadvance/specter-diy
- Bitcoin Core releases github.com/bitcoin/bitcoin/releases
- BlueWallet bluewallet.io
- Nunchuk nunchuk.io
- Keeper bitcoinkeeper.app
- Bull Wallet wallet.bullbitcoin.com
Keys, entropy & verification
- Printable, cuttable BIP39 word list seedxor.com/files/wordlist.pdf
- Ian Coleman's BIP39 tool — for verifying seed generation offline iancoleman.io/bip39
- Coinkite on verifying dice roll math coldcard.com/docs/verifying-dice-roll-math
- Inspecting PSBTs with third-party software bip174.org
- Printable seed and SeedQR forms github.com/SeedSigner/seedsigner/tree/main/docs
Hardware
- Waveshare 1.3″ 240×240 LCD hat waveshare.com/1.3inch-lcd-hat.htm
- Disabling WiFi and Bluetooth on Raspberry Pi boards by hardware github.com/DesobedienteTecnologico/rpi_disable_wifi_and_bt_by_hardware
- 3D-printable enclosure designs github.com/SeedSigner/seedsigner/tree/dev/enclosures
- Accessing advanced webcam settings on Windows addictivetips.com
Testnet
- Alternate public testnet Electrum servers 1209k.com/bitcoin-eye
- Testnet faucet bitcoinfaucet.uo1.net
Further reading cited by the guide
- Michael Flaxman — 10x Bitcoin Security Guide btcguide.github.io
- The Hitchhiker's Guide to Online Anonymity — source of the supply-chain threat graphic anonymousplanet.org/guide.html
- Jonathan Bier — The Blocksize War: The battle for control over Bitcoin's protocol rules (book, no link in the guide)
- bitaddress.org — the paper key pair generator behind the author's 2013–14 cold storage bitaddress.org